You do not need to know any electronics to do this project
A microscope magnifies small objects to explore the beautiful world of microorganisms or anything that cannot be seen by our naked eyes. It will make us realize that a big world exists even in a drop of pond water.
So, can we build a microscope ourselves?
Yes! Of-course you can build your own microscope, using which you can also take pictures and videos.
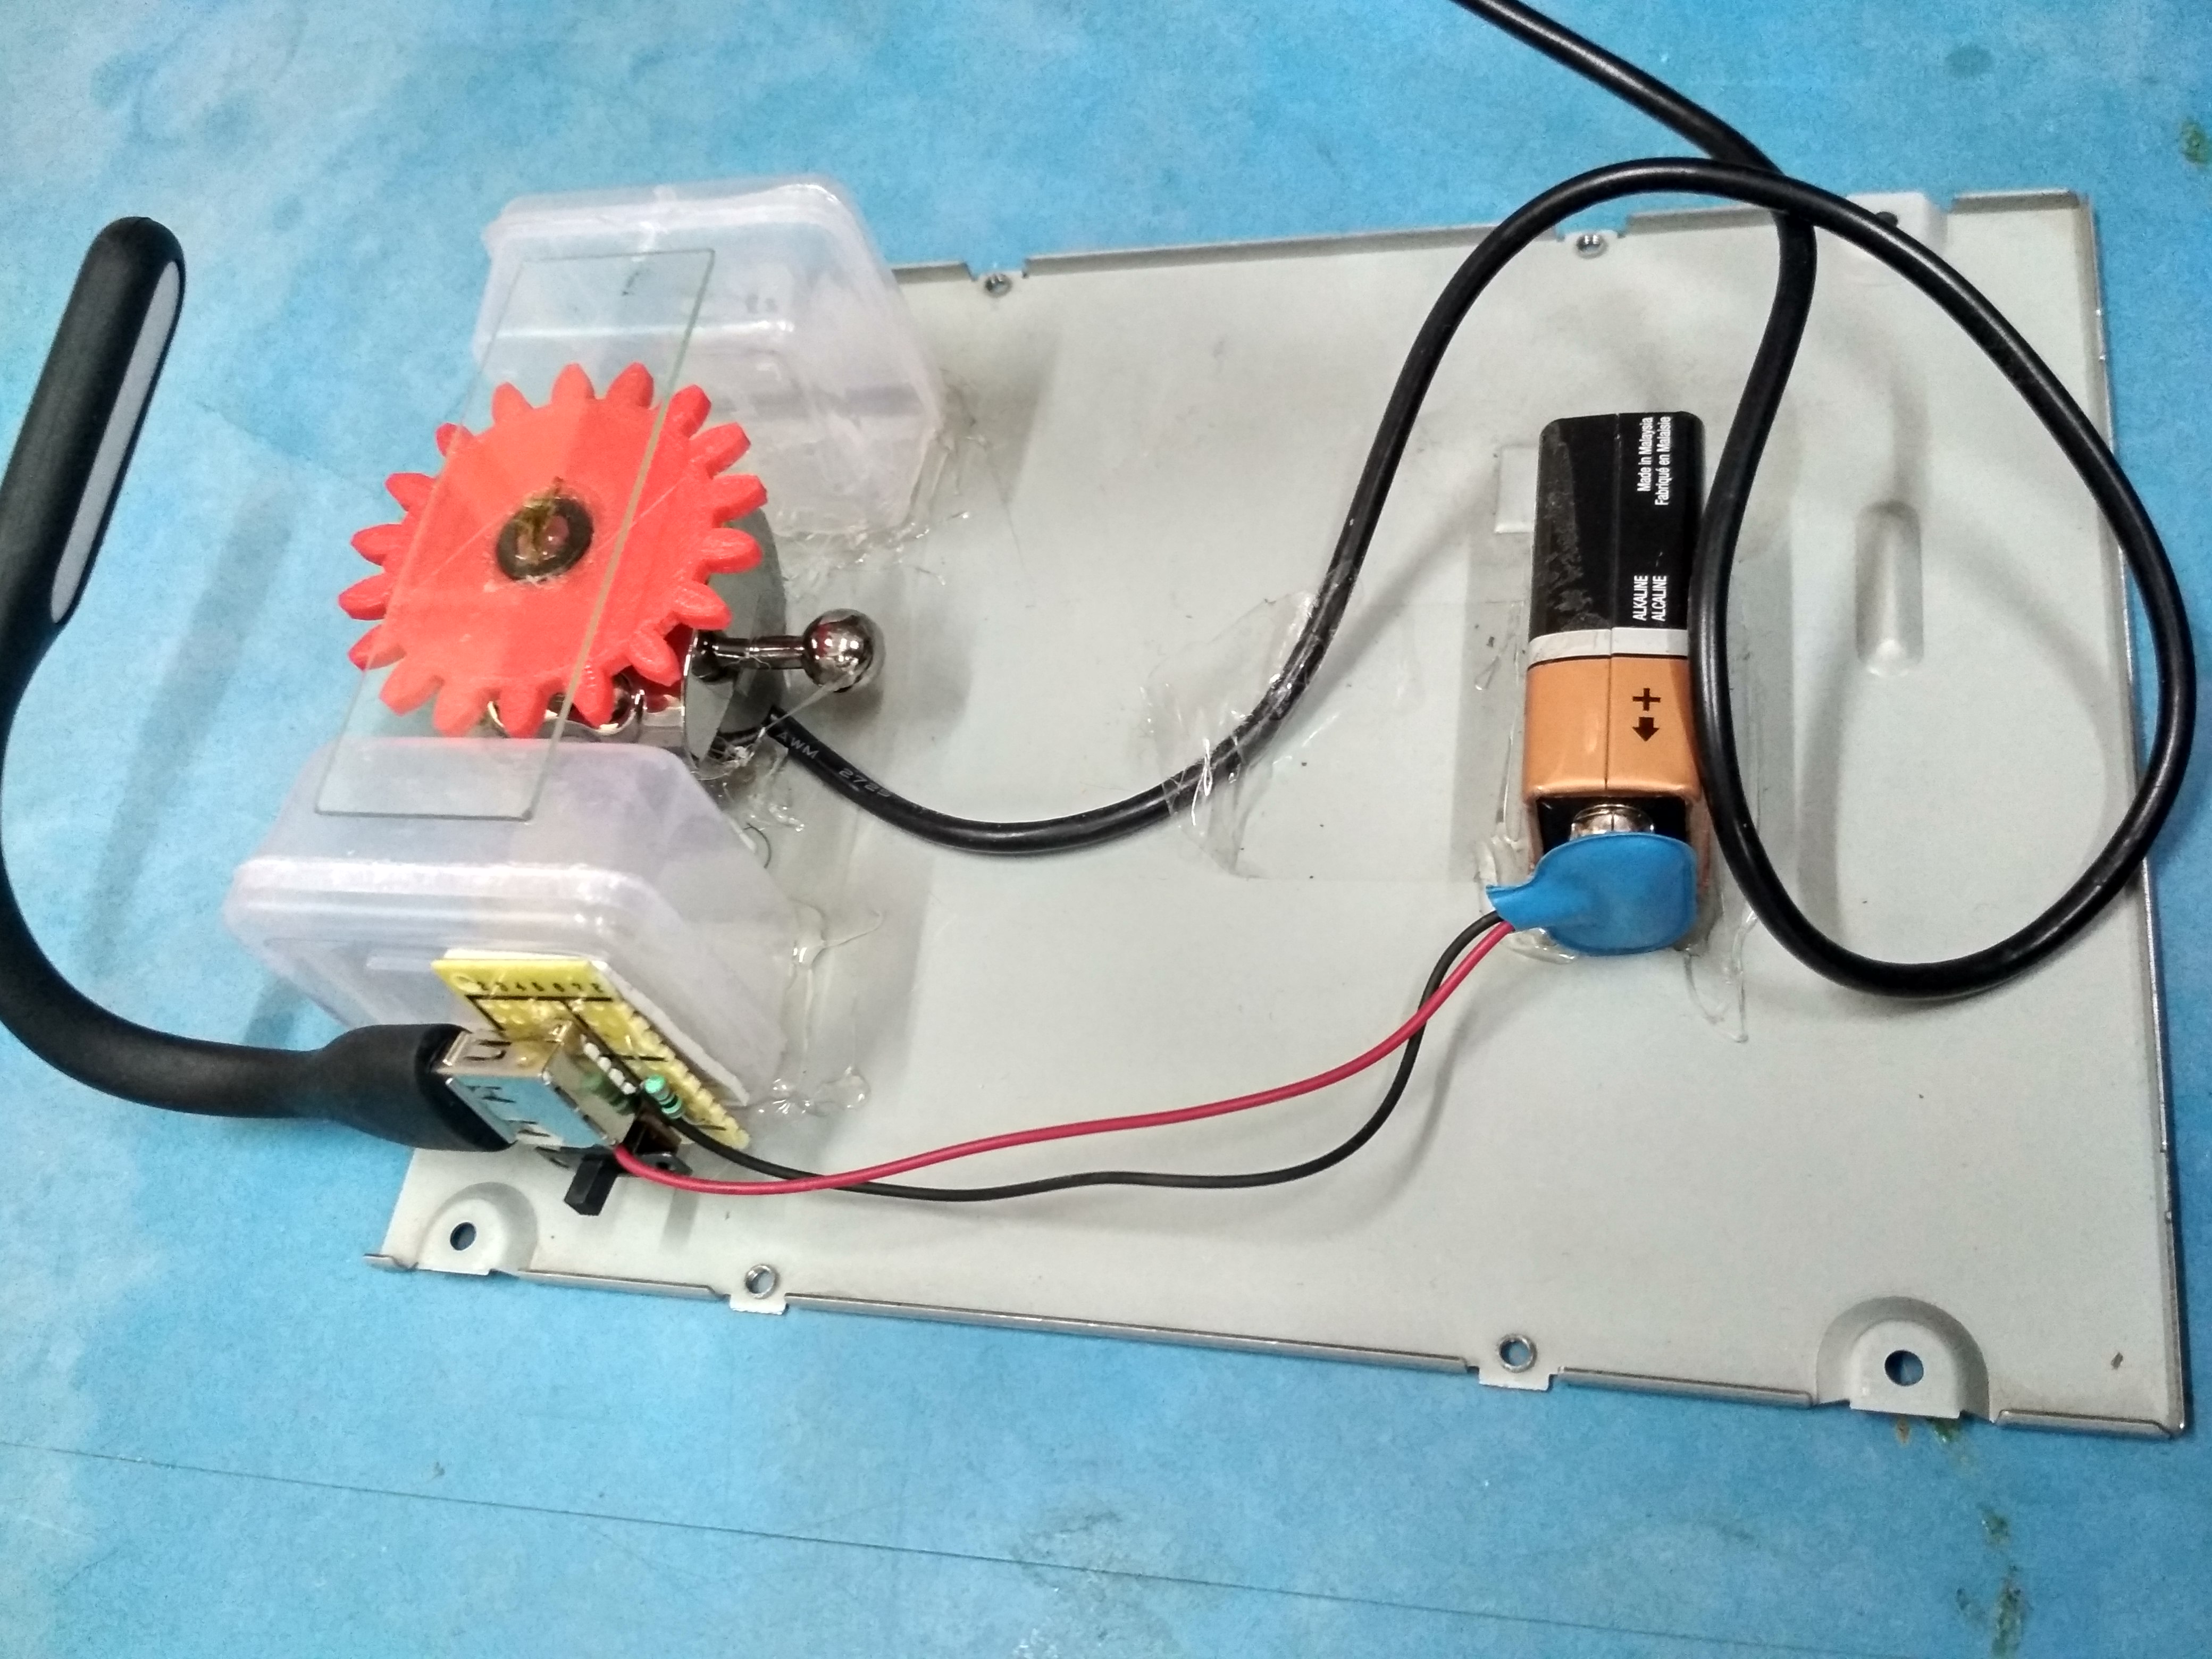
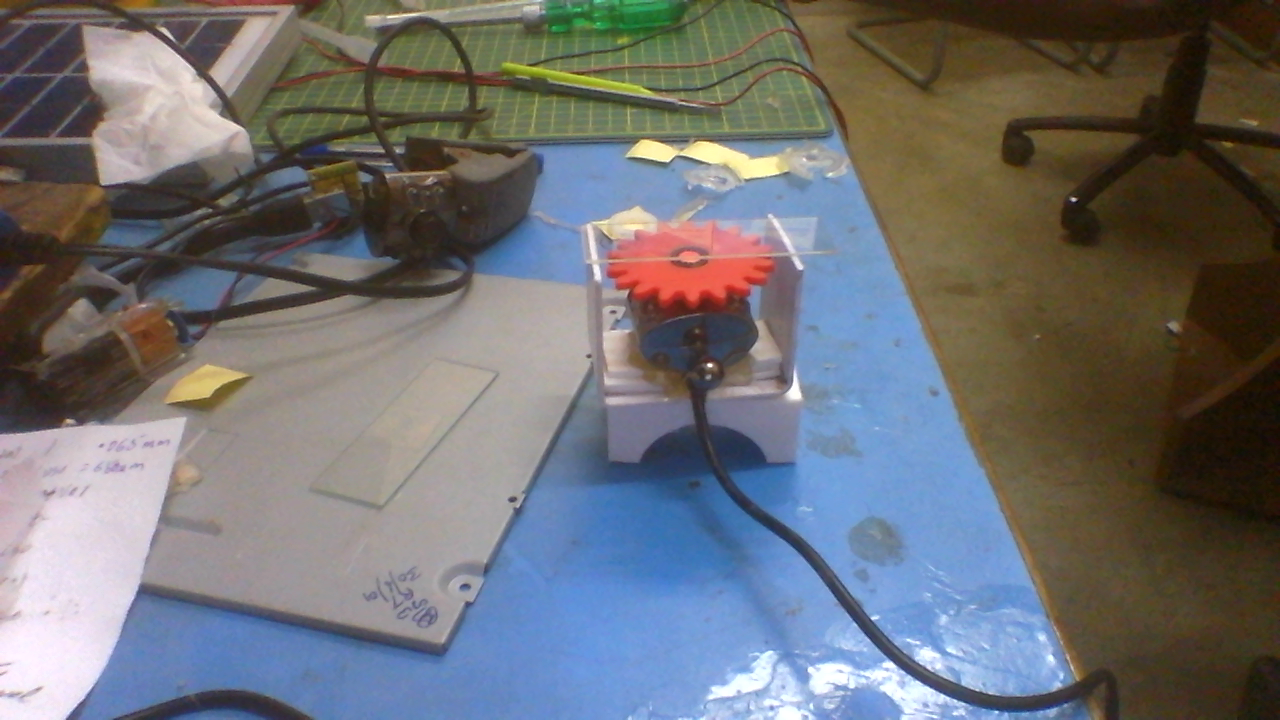
The picture shown below is one of the very low cost DIY (Do It Yourself) Digital Microscope made using a webcam followed by the images of microorganisms without additional light and with additional light respectively taken from the same microscope.
You can also build and add a multi-axis stage to adjust either the lens or the sample slide and check out a few of the millions of living microorganisms around.
While you are making whatever questions you have, whatever help you need, please ask by replying to this topic.
Report the following by clicking the reply button
Photos of your microscope
Details of webcam used
Details of the multi-axis stage if you have built one.
Measure the resolution of the microscope?
Magnified photos of five different microorganisms observed under your microscope.
Try to identify what you see, or ask the community to identify them.
Duration for completing this project is 1 week.
You can visit the following links for getting more help:
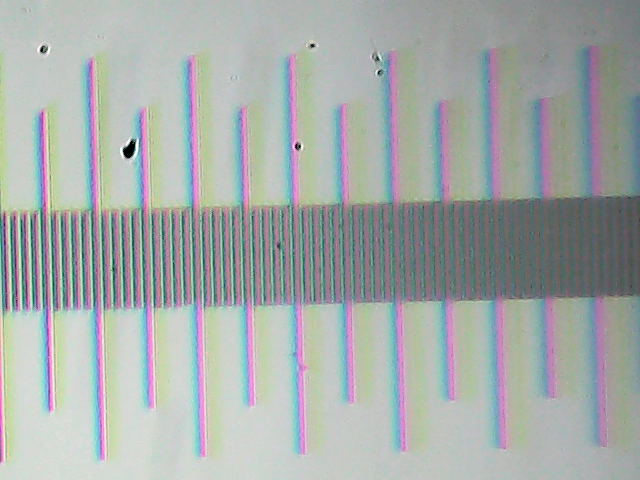
Calibrating a microscope.
Use a micrometer slide.
1 small division is 10 microns
Image size is 650 micron in the horizontal plane.
Notice the slight skew?. That will produce a error. However the skew is less than half a division. Which means we cannot get a better calibration.
We need to calibrate separately in the vertical plane too. Cmos imagers have different resolutions in the vertical and horizontal plane.
So that we can measure the dimensions of the subject. Magnification and resolution will vary. Hence one needs to know the size of the image that the camera produces with a given lens.
If one were doing colour measurements, colour calibration is also required.
That will help us to measure what we see. If one complete width of the image is 650\mu then we can get a good estimate of the objects we see through the microscope.
This is very important step of every instrument that we build. Each microscope may have a different component, lens or the CCD we use make the digital microscope. Therefore it is even more important to do this every time we make one.
The CMOS imager plane is not parallel to the slide. Hence we do not have good focus. This is due to the curved shape of the camera housing. I will get rid of the housing and seat the board flat.
Chromatic aberration is partly due to the pathetic lighting from the built in camera LEDs. I will remove those. Then we can provide much better external multiangle lighting.
One could rebuild the lens by removing the top cap and dropping out each component. Then re assembling the same by reversing the order of the elements. The elments consist of multiple lenses and spacer ringss. Each spacer ring is used to hold the previous element at the right focal distance. The bottom most element - which becomes topmost in our inverted world - is an IR cut filter.
